
Quick start
Deadnaut is complex, hard to master, and strategically subtle. It can be punishing at times, and should you lose your crew, the results are final. No reloading.
But the campaigns are short and tight. They can be finished in an hour, provided you last that long. And if you don't, then it's easy to jump back in: your custom crew is still there, ready for another adventure. Or you can just fire up a new campaign and let the game build a crew for you.

Who are you?
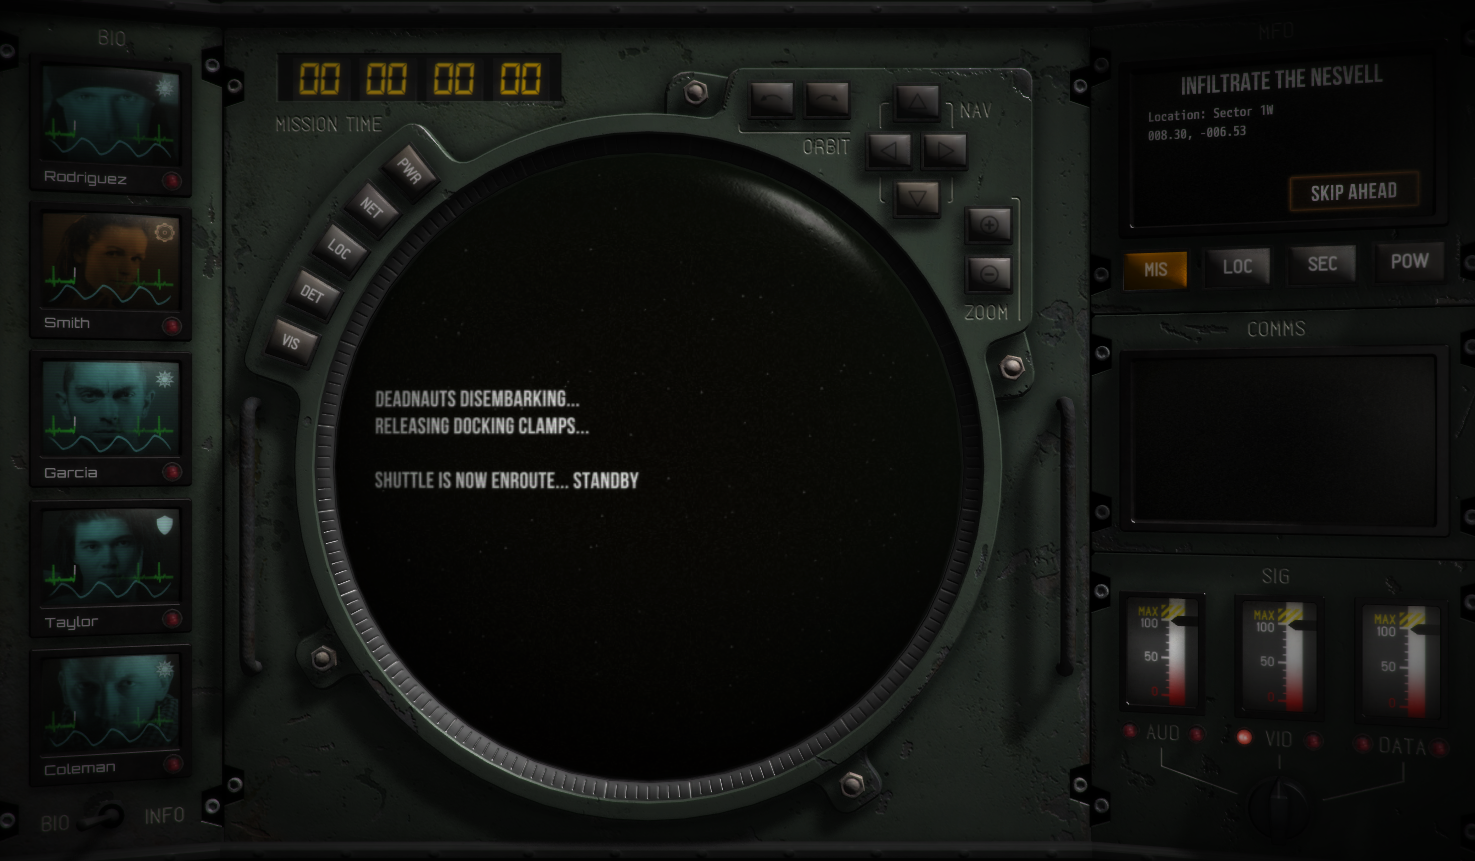
You aren't a disembodied, godlike controller. You are sitting in the cockpit of a small exploration vessel remotely issuing commands to your squad of Deadnauts as they explore a floating ghost ship.
This link between you and your Deadnauts is sketchy at the best of times. But it can be further disrupted by the security system of the ship your Deadnauts are investigating.
Mystery
Much of Deadnaut's design revolves around mystery. You never know what you're up against. Every mission has your Deadnauts arriving on a derelict. They, and you, have little knowledge of the layout or the enemies. As you progress through the campaign, your Deadnauts will gather information. This info can be used to help make decisions, and it's also quantifiable - trade your knowledge to upgrade your gear.
But you - the player - are not always given the information you might want. Your cockpit is not a slick, omnipotent machine that mystically reveals all. It has limitations and it can be vulnerable to attack.
Mastery of the game requires understanding the information you have, looking for hints, adapting to new situations, and hedging your bets. There's never a clear path.
Before we start
Deadnaut may appear similar to other games, but it does many things differently.
-
There are few finite resources in the mission. Your Deadnauts have unlimited ammunition, they can use their stims as they please, they can hack whatever they want. When you buy some technology on the market, you can replicate as many as you need.
-
Instead, there are consequences. Blasting rockets around will damage the ship - do it too often, and the whole vessel will explode, killing everyone on board and ending your campaign. Stims might sound like a good idea, but they cause withdrawal when they wear off. And the next time you use it, the bonus is shorter and the withdrawal longer...
-
Many aspects of the game are obvious - the pros and cons of using a blast weapon over a beam weapon are fairly clear. But there are many systems grinding away underneath that have subtler effects. For example, a Deadnaut's 'stability' wave may not seem like a big deal, but it can impact many activities.
-
Pay attention to the environment. The ship your Deadnauts are investigating exerts a lot of influence over the mission. For example, it distributes power to various subsystems, which can make your Deadnauts more visible, increase or decrease the health of enemies, or dramatically alter the ship's security systems. The ship is also falling down around you and being in a heavily damaged room can cause injuries.
-
The game features many 'roguelike' qualities. Levels, items, ship logs and enemies are dynamically generated, which adds a lot of variety. It also features 'permadeath' - when your crew is wiped out completely, the game is over and you can't reload.
-
As long as you have one crew member alive at the end of the mission, you'll be able to move to the next. You can also clone any deceased Deadnauts between missions.
Strategic approach
This guide will help you knit together a strategy. And then, when everything goes wrong and it all falls apart, it'll help you figure out ways to adapt.
But remember: there's no right way to play. Have fun, experiment.
Step one: look before you leap
You have a crew of five Deadnauts. Maybe you crafted them yourself, or perhaps you rolled the dice and jumped straight in with an allocated crew. Either way, spend a few moments getting to know them.
By default, you can press 'Q' to look left and view the character screen. You can also move your mouse cursor to the far left of your view, at which point you'll see a light-blue glow. Left-clicking while this glow is visible will reveal the character screen.
Meet the crew
What skills do they have? You'll generally want to think about their immediately useful qualities: combat, protection, detection and hacking.

As you become more familiar with the game, you'll want to explore other skills, such as intuition and investigation. Later, you'll also want to think about relationships, stability and flaws. But those are more advanced systems and you've already got a lot to think about.
The mission
What do we know so far about our mission? Press 'E' to look right and click the Campaign button. As before, you can move your cursor to the far right and click to see this screen.
The briefing will give you some hints about the ship, as well as your mission goal. In this case, we need to find the Ship's Log, which is located in the Bridge.

If you want a more thorough breakdown, click Ships.
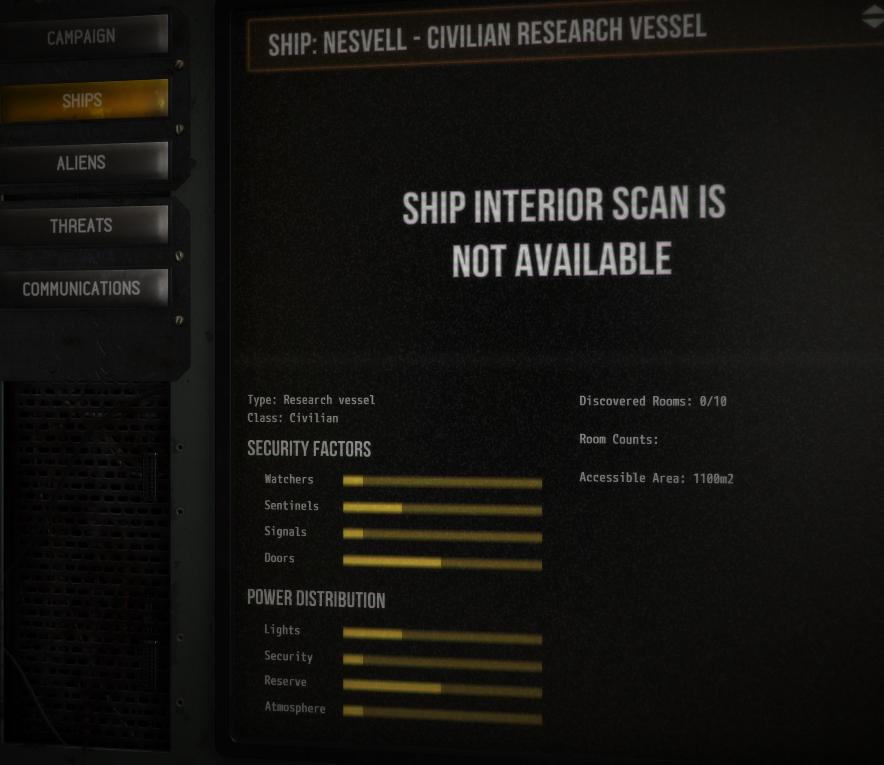
The important thing here is we know roughly how the ship is distributing its power. We know it's prioritising reserve power - this is good news, because the crew can tap into the ship's reserve power when using some weapons and equipment.
The other important thing to note is the Security breakdown. Although the ship isn't diverting much power to security overall, we can see that doors and sentinels are getting the most attention.
This information is crucial. If the ship were, say, distributing a lot of power to life support or security, then it might dramatically change how we approach the mission.
Step two: get ready
Let's recap. Our mission is to retrieve a Ship's Log. We're not required to kill anything or investigate corpses - we just need to get the log and leave.
We know roughly what the ship might throw at us. We won't need to worry too much about running out of power, and the security system isn't too dangerous. But it would be handy to have some kind of hacking capability.
With that in mind, check out your crew. Look at the equipment you have available and look over your crew's stats.
Just because your crew has a certain set of skills, doesn't mean they're always useful. For example, our crew doesn't have a dedicated hacker, but hacking might be useful to help deal with those tricky doors. So let's equip one anyway.
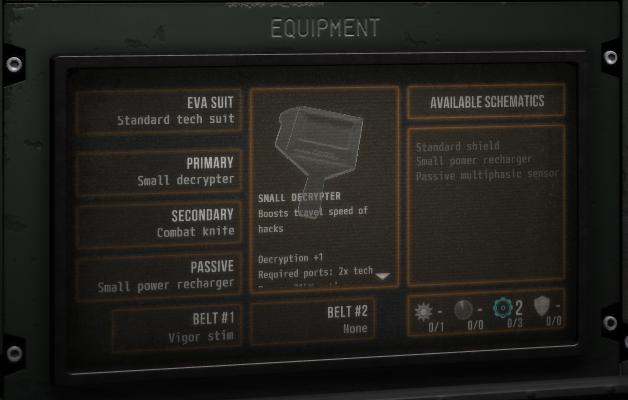
With everyone equipped (all Deadnauts must have a suit and a primary item), go back to the main console, click the MIS button on the top-right display and press Deploy Deadnauts.
Step three: group dynamics
Have a look at your Deadnauts. Are they getting along? Right-click the portraits (or flip the BIO switch at the bottom of the portrait screens) to see if there are any active effects.
If you have an uncooperative group, then all their skills will drop. Check out the relationship panel on the character screen to see if someone's bringing down the group. If so, maybe you can separate them from the rest?
It's not uncommon to split a group with a negative penalty into two groups, and have both groups gain bonuses.
Step four: get your bearings
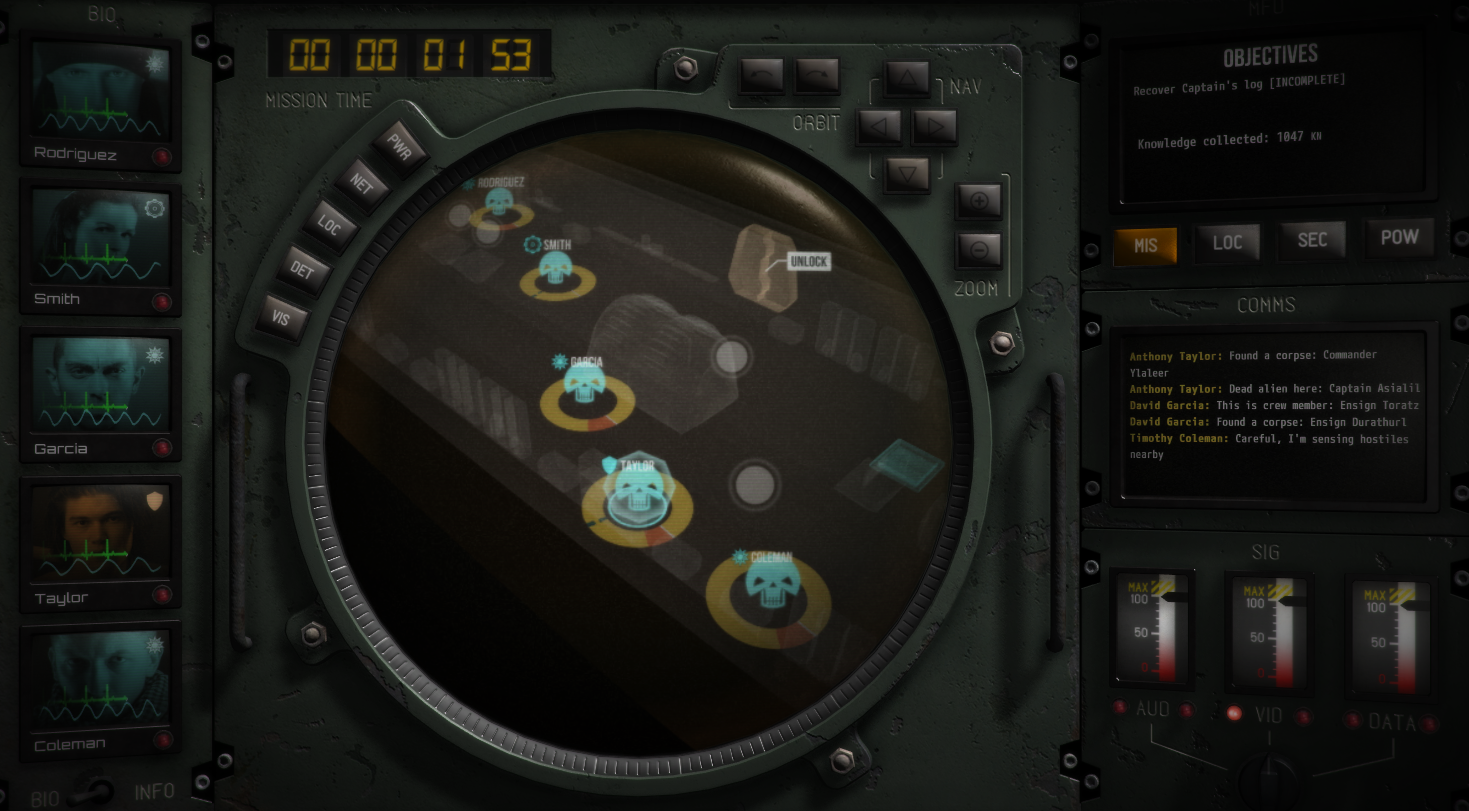
Investigate any corpses you see in the starting room. At the very least, this will increase your Knowledge score, allowing you to purchase more tech at the end of a mission.
Before you open that first door, take some precautions.
- Do you have a Deadnaut with sensor equipment? You can ping the other side of the door and see what's there.
- Do you have a hacker? Open the door from a distance.
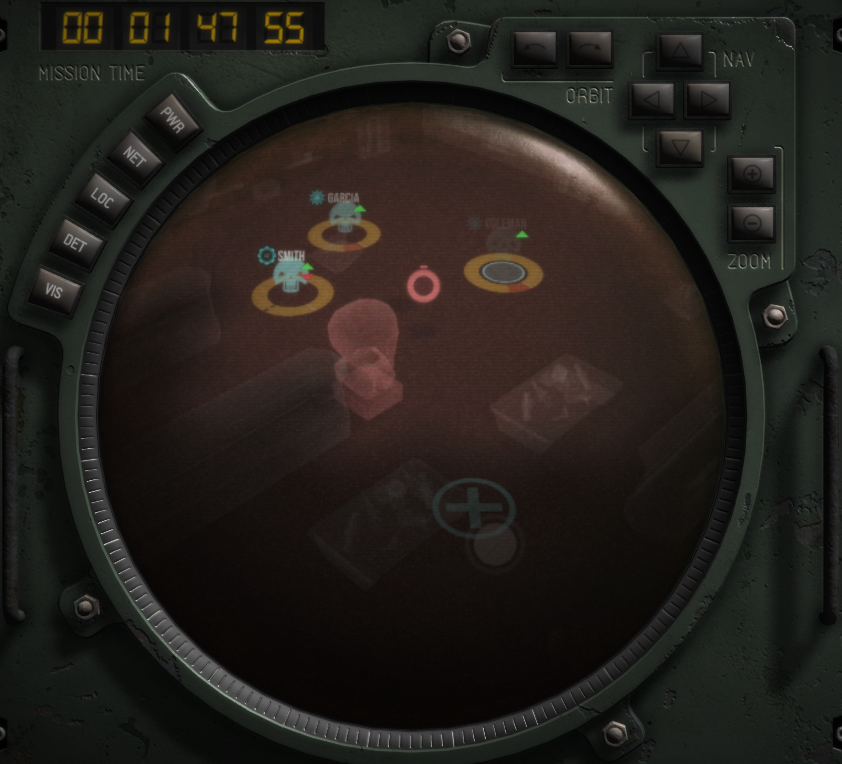
And don't forget about Watchers. They do two things: first, they dampen the signals going to and from your Deadnauts, making it hard to issue orders or see what's happening.
Second, they'll try and revert the ship back to what it was before you arrived. If you've opened a door, they'll close it. If you've hacked a sentinel, they'll seize control of it.
In this case, let's say you open the door and start moving your crew into the next room. What would happen if a Watcher suddenly closed the door, isolating a Deadnaut in a room with hostiles?

Never underestimate Watchers. They can quickly ruin your day.
Finally, check the other instruments on your panel. Scroll through the MFD in the top-right. The MIS screen will show you whether you've completed an objective, and importantly, whether you can extract your Deadnauts. You'll also want to check the LOC panel to see how damaged the ship is - if the overall structural integrity drops below 10%, the ship will explode.

And remember to watch your signals. If a channel is being targeted by a Watcher, turn the dial to boost the signal.
Step five: handling encounters
A good thing to keep in mind is that it's highly likely you'll be killed by whatever's on the other side of a door.
Before you engage an enemy, ask yourself a few questions.
In what ways can it kill my Deadnauts?
Does it shoot from a distance? Does it have any vulnerabilities? Is it fast? How can I kill it?
You won't know all this information at first. But you can always get a rundown on the enemy on the Threats panel in the Library screen.
My Deadnauts have had a few scrapes with the enemy and have collected some information. We can see, for example, that it only does melee damage. But, disturbingly, they can also drag a Deadnaut to another location.
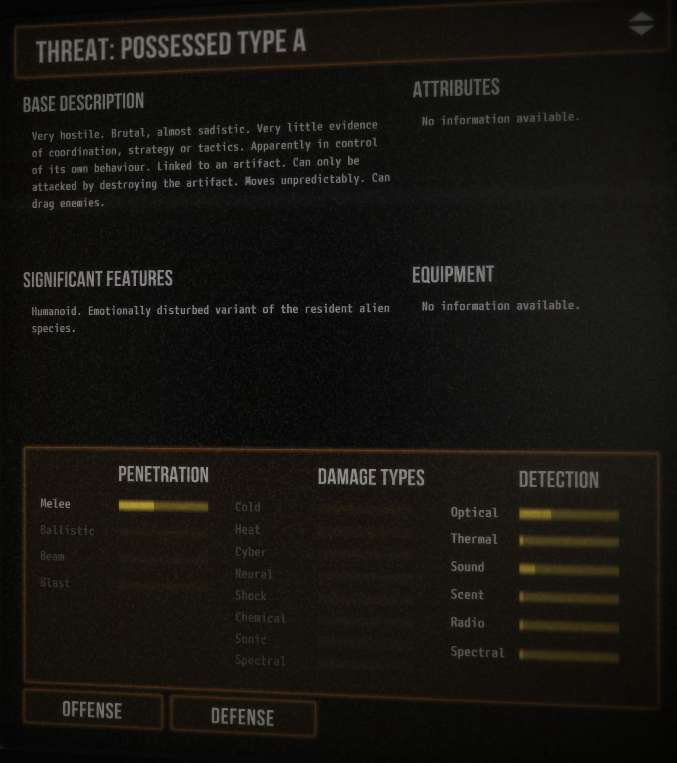
So, if we can keep our distance, we might be ok. And I also know that if a field is being cast on a Deadnaut, then they can't be dragged - better keep my field-equipped Deadnaut nearby.
How can it be killed?
Some enemies can be killed on the spot, others might require some special conditions. Above, you can see this particular enemy is attached to some kind of totem, meaning I'll need to destroy those first.
At some point you'll need to attack it directly, either to kill it outright, or just defend yourself. The Threats panel may also show any particular resistances it has. If it's highly armoured against ballistic weapons, then perhaps you should get your axe-wielding Deadnaut to take it down.
How should I prepare?
You may not have an opportunity to prepare. But if you do, there's a few things you could do.
- Use sensors to see what's around
- Hack any nearby sentinels - they'll fight for you, not against you
- Place firewalls to stop Watchers glitching your signals, closing doors, or turning that friendly sentinel against you
- Throw fields on your Deadnauts to boost their defenses and stop them being dragged
Everything's gone wrong!
Many things can go wrong. Here's a selection:
- One of your Deadnauts got dragged out of the room, and now he's gone
- There's a hostile sentinel in the middle of the room and the only person who can hack it got dragged out of the room and killed
- Your Deadnauts were too trigger happy and blew up some doors and sentinels, causing the ship's structural integrity to drop, and now your crew is taking damage
- You've retrieved the log, but you can't make it to an escape hatch because the room on the left has a sentinel in it and the room on the right has mostly collapsed and you'll be killed if you try and walk through it, and the one in the middle has a bunch of enemies waiting for you.
It's possible that this is the end of your crew. But before you throw in the towel, you might have some options
- Some Deadnauts may be more stable than others, meaning they'll move faster, shoot straighter, and function better
- Deadnauts can use stims to temporarily boost their performance across the board
- If you can find a power controller, you can boost the power going to any room on that circuit, meaning your Deadnauts can draw more power. Alternatively, you can lower the power on the circuit, which could reduce life support and make enemies weaker
- Can you form a cooperative group of Deadnauts?
- Is there a way you can distract the sentinel?
- Maybe there's a Deadnaut you can sacrifice for the good of the group?
Remember, you only need one Deadnaut to finish the level. You can always clone the others and bring them back to life.
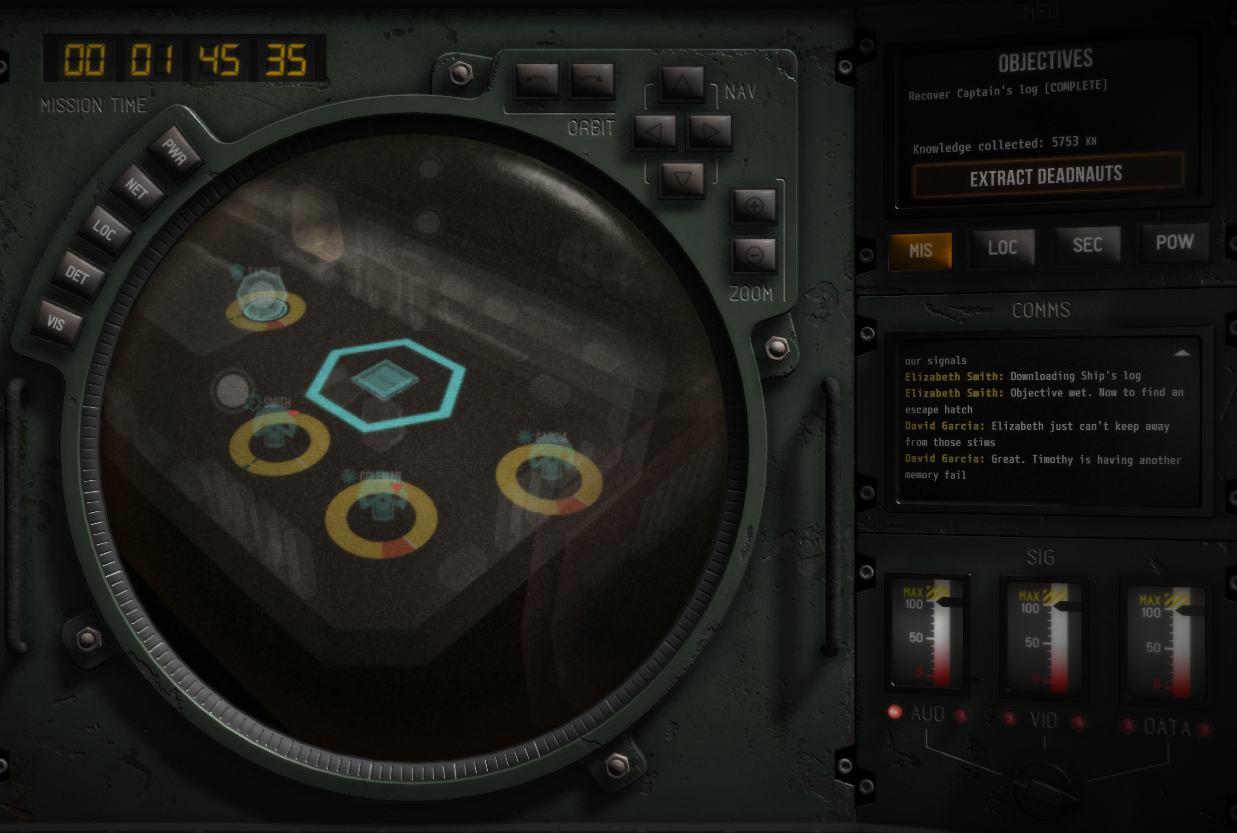
Step six: completing the objective
The Deadnauts have reached the Bridge computer and downloaded the ship's log.

Once you've completed the objective, you'll need to make it to an escape hatch. Once all your Deadnauts are there, you can extract them.
Step seven: what now?
You've completed the first mission, but your next mission will be tougher. So before you dive in, visit the Communications panel and purchase some equipment. Once you've purchased something, it'll be available to all Deadnauts.
But don't just buy something because it sounds good. Look at your next mission briefing - do you know what you're up against? Maybe there's an attribute about the enemies you can exploit? Or perhaps you want to buy a clone of a deceased Deadnaut?
There's no right answer. But if you plan well, then you'll have a fighting chance.